A Review on Cosplay in China

Along with the increasing number of cosplay activities in China, and especially the sharply climbing popularity of China Joy Cosplay, this performance art is known by more and more people. Below, let’s take a closer look at the history of cosplay in China.

It’s reported that cosplay was first introduced to Hong Kong, China in 1993. There is another saying that cosplay first appeared in Taiwai, China in 1995. But no matter which saying accords with the truth, cosplay in China began at a time that’s much later than the origin of cosplay in some western countries.

At that time, cosplay shows were organized by a small group and popular only in a small scale. In Taiwan, most of cosplayed characters were from video games. An organization in Hong Kong, named 400 feet, cosplayed the Allied Forces in Legend of the Galactic Heroes in 1993. With climbing popularity of cosplay, Hong Kong Cartoonist Association held a cartoon show which was a real visual feast for cartoon fans in 1998.
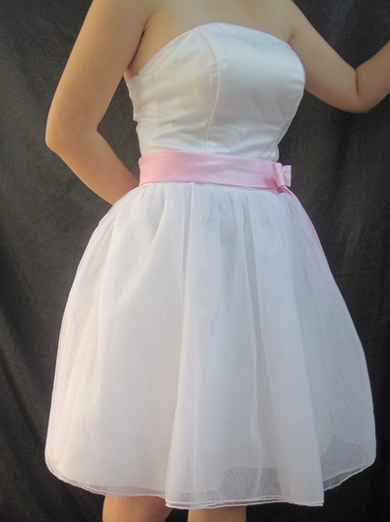
Girl from China Joy

Compared with Hong Kong and Taiwan, cosplay in the mainland of China has a shorter history. It firstly emerged in mainland in 1988 and gained a skyrocketing improvement since cosplay in Japan, Taiwan and Hong Kong developed in a fast pace. In August 2000, the first cosplay competition in the mainland was held successfully.

In the wake of this funny & fantastic show, a series of cosplay competitions were staged, sponsored by some famous websites in China like Tencent and China Joy. As above picture shows to us, splendid cosplayers like this one seem rather stunning! In 2011, Cover Coser competition definitely stirs up a new trend in China.

As a hot spot drawing most cosplay fanatics’ attention, Cover Coser Competition is sponsored by China Joy and organized by Howell Expo. The jury members are from all circles like Tencent, Posts and Telecom Press. On January 12, cosplay fanatics were pouring to upload their cosplay pictures to China Joy. The list of winners was published on April 22. According to the report, participants this year showed better performance what cosplayers of previous years did.

The picture above is the artwork from the champion, named Xiao Meng. He started his role playing life in 2003. During these years, many terrific characters were cosplayed by this young and handsome boy. Besides, he wins a bundle of prizes for himself. This time, he cosplayed the character in Yasha Kisouden and won the first prize. Stunning?

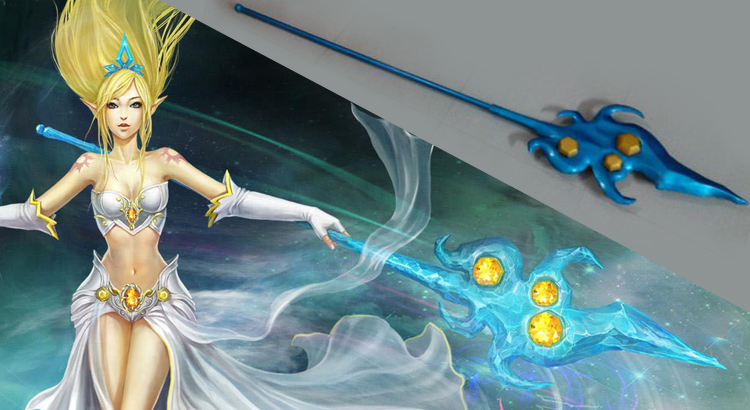
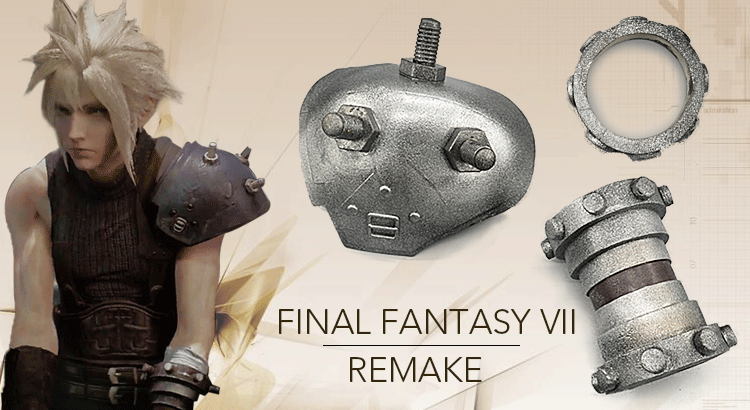
The runner-up is Zhao Jing whose English name is Rayna. You can also call her Maru. She was born in Nan Jing, Jiang Su Province in China on August 7, 1988. In this Cover Coser competition, she cosplayed as Lightning in Final Fantasy XIII. Her terrific cosplay drives me crazy!

The bronze medalist is Lalaax. He studies at Guangzhou Academy of Fine Arts. His Bleach Murus Hierago cosplay helped him win the bronze medal. In this competition, he tried something new and exceeded the limit.

From these wonderful cosplay works, we can make a conclusion that cosplay in china has stepped into the right track. Just as the jury of Cover Coser said, the strength of contestant had a dramatic enhancement. It’s totally believed more excellent performances will be released in the China cosplay world.

How to Make Magical Girl Tomoe Mami’s Long Gun?

After knowing many tutorials on making cosplay props, weapons and costumes, we plan to learn how to make Magical Girl Tomoe Mami’s long gun today. For sure, it’s easy, especially when you have grasped below tips. Now, let’s begin.

This is Tomoe Mami with her gun.

Required tools: scissor, art designing knife.
Materials: EVA (5 mm thick), PVC pipes, foamed board, mighty bond, white latex and automatic spray paint.

1. Draw the desirable size and decorative pattern on the paperboard.

2. Cut off the drawn pattern, which is definitely the pattern on the back part of the gun.

3. Put the paperboard on EVA that’s 5 mm thick and draw all lines. Use scissor or art designing knife to cut out the pattern. I used art designing knife to cut the decorative pattern. For sure, this depends on the skill of your handwork and patience.

4. Draw several under layers that are a little smaller than the decorative board. How small they should be depends on materials you use. Here, EVA is used. But wood or other materials will be different.

5. Stick the baseboard to the outside frame. Remember two baseboards and two frames are needed.

6. Draw the thickness and length of the gun on the paperboard.

7. Likewise, put the paperboard on EVA that’s 5 mm thick and cut out the shape. You can also omit the sixth step and directly cut the pattern on EVA board. After taking the measurement, draw by ruler and cut it off. Then, joint it with the decorative baseboard.

8. An empty box has been finished.

9. Find a PVC pipe and insert it into the box until it reaches the bottom. This pipe is 1 meter long. But how large it should be depends on the size of your box.

10. Cut apart the spearhead. Make details on the gun shaft by EVA that’s 1 mm thick. The front sight is made from foamed board or EVA that’s 5 mm thick. But EVA is much softer than foamed boards.

11. Make the trigger. Foamed board that’s 5 mm chick is adopted. Other materials like EVA with thickness of 5 mm are much softer.

12. Material used to make the trigger is also used to make the driving hammer part. Screw can be used to make the hammer movable.

13. The gun has been roughly finished.

14. When the external form has been completed, it’s time to color. Paint white latex twice on the EVA part. When it dries, begin to color. First paint black ground color. Then, essential color should be made by silver coating.

15. After coloring, it looks like this.

16. The gun is finished.

To make cosplay props will be challenging, yet also interesting. For more information, just pay a visit to Miccostumes.com.

How to Make Vocaloid Magnet’s Dress by Transforming a Cheap Wedding Gown?

It’s an interesting matter to make cosplay props by ourselves. And most costumes or weapons don’t cost us a lot. Below, tips on making Vocaloid Magnet Costume by transforming an amazingly cheap wedding gown are shared with you.

Required items: a cheap wedding dress purchased online, 1 meter of striped cloth, 1 meter of hard lining, 4 meters of organdy or yarn, 1 meter of organza, a roll of white line and a packet of needles. Actually, there will be redundant fabric that can be used to make other things.

1. Neckline. This photo shows you the wedding dress I bought online. (About cheap wedding dresses, you can check here!) The neckline can be altered. Just cut out the desirable shape and sew it up.

2. Bowknot. Below, you see materials we will use later (the sash has been made in advance. I’ll show you how to make it later).

Cut a piece of hard lining that is 1 meter long and 35 CM wide. Then, cut a piece of organdy or yarn that has the same length but double width than the hard lining. Encase the hard lining by organdy and fold it for three times like below picture shows to you.

Pinch at the middle of this semi-finished item and sew it by needles. Then, the bowknot is completed. To help it seem more gorgeous, diamond-like sequins are used, which is sold under $2 per meter.

3. Train. It’s very simple. Just find a piece of organza that’s 3 meters long and fold it in the middle. Sew the train together with the bowknot. To enhance the beautiful sense, you can add some lacework on the edge, which only costs you about $2.

Attach the train, bowknot to the sash by a pin.

The train has been finished.

4. Sash. Method to make the bowknot can be used to make the sash again. First, find a piece of hard lining that is 10 CM wide. The length should be 5 CM larger than your waistline. Striped cloth should be doubly wide and 5 CM longer than the hard lining. In this case, it can be folded inwards. Then, cover the hard lining by striped cloth (if possible, iron it please). Sew them up on all sides and sew the adhesive buttons onto it.

After wearing a sash, the waist seems rather slim \(^o^)/.

The original wedding dress has bra-like undergarment. So don’t worry the dress will not look great because of your small chest. More tutorials can be found on Miccostumes.com.