Seraph Of The End Mikaela Hyakuya Cosplay Makeup Tutorial

Seraph of the end
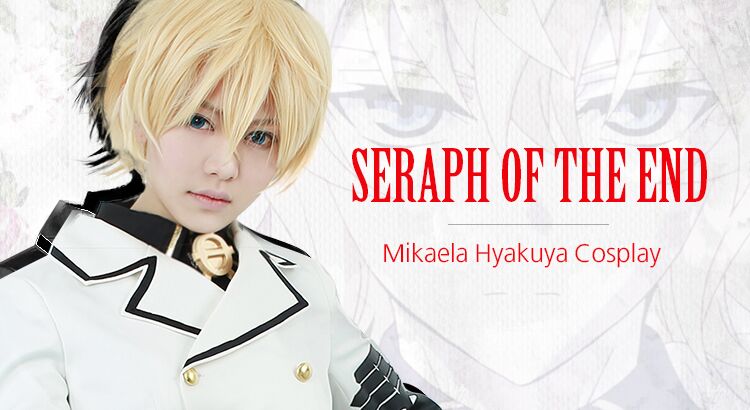
Makeup is  the art on your face, and for cosplay, it is more about changing your face for a specific character from 2 dimensional world. Mostly eye makeup is the key to the whole look, so we will mainly talk about the Mikaela eye part in this tutorial.
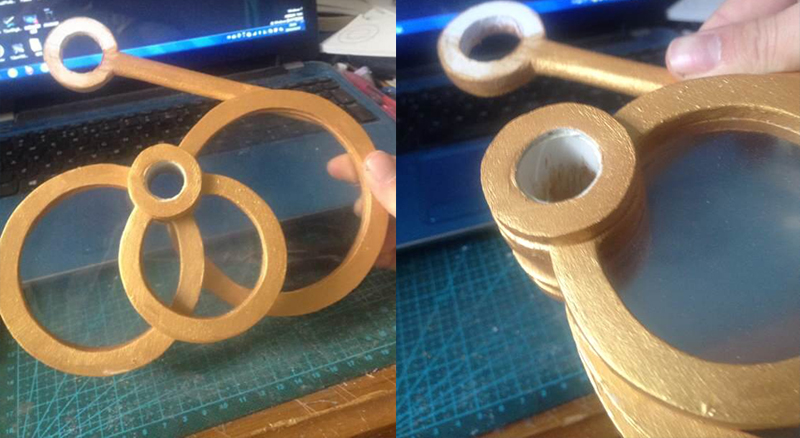
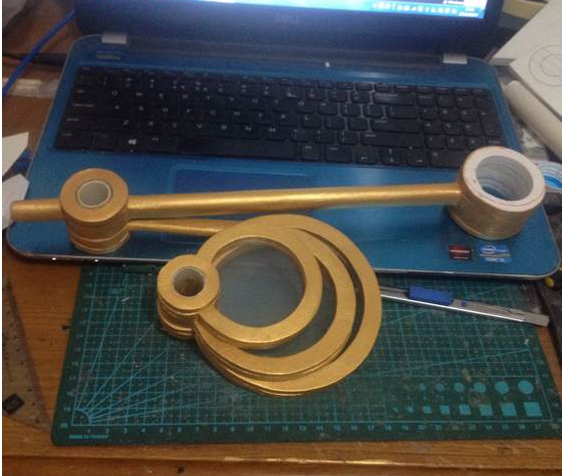
Materials:
1.Concealer
2.Eyeliner
3.Eyebrow pencil
4.Lipstic
5.Cotton swab

To aviod messing or bluring the makeup, it’s better to wear the contacts ahead of time. Here is how the eyes look like without any makeup.seraph a
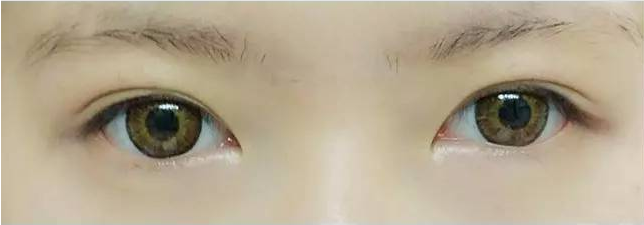
To begin with, use concealer to cover all over the eyebrow, apply evenly and tap the edges to make it natural to  see. After that, draw on brows according to the character feature. The eyebrow shape has been marked with red lines as the picture below.

Also pay attention to the eyebrow tail trend.seraph b
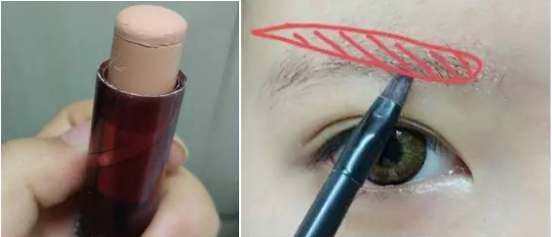
Do not make the brow heavily penciled, when done with the shaping, it looks like thisseraph c
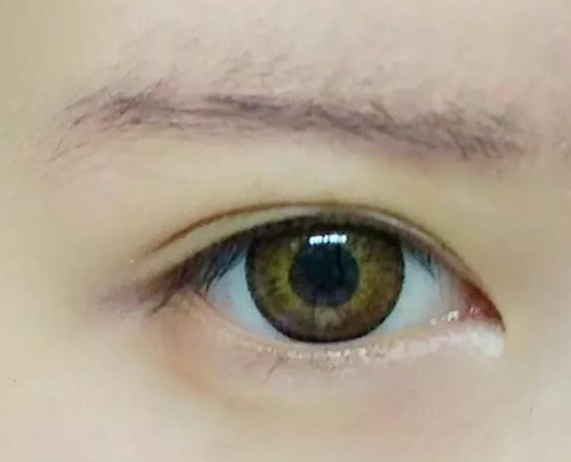
Next, lining eyelids. This is the eyeliner used. seraph d
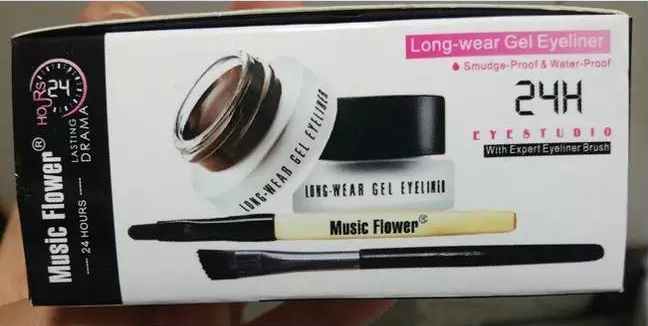
Draw from the inside to the outer corner of the eye without any hands tremble, For the unmarked corner, you can either disregard it or draw according to your own face shape.
Besides, close you eye to check, and take care of the details.Seraph eSeraph f
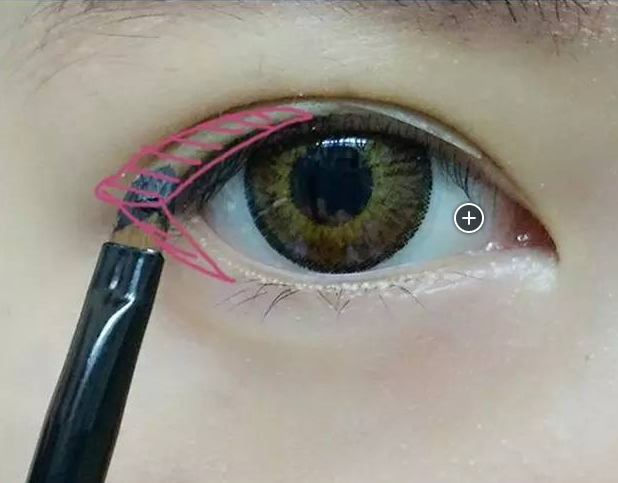
Done with that, appy some shadow to the outer corner of the eye.Seraph g
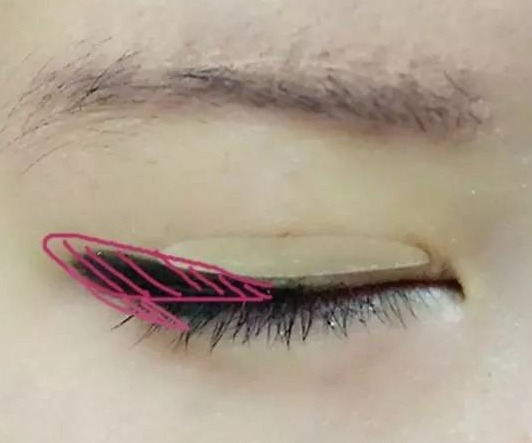
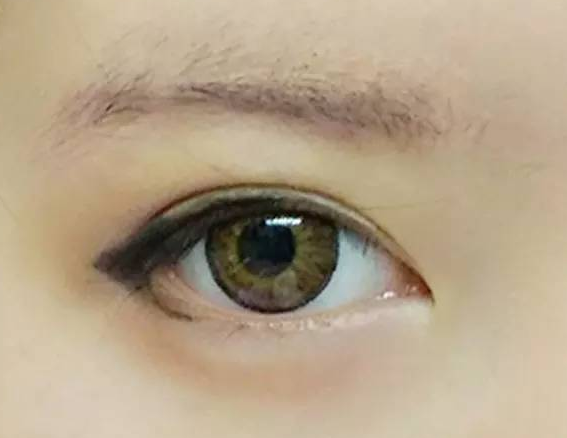
Commonly, anime characters have abnormal big eyes and double eyelids. Here we will use brown eyeliner to  draw a fold on the eyelid. Again, control your hand from trembling. seraph h
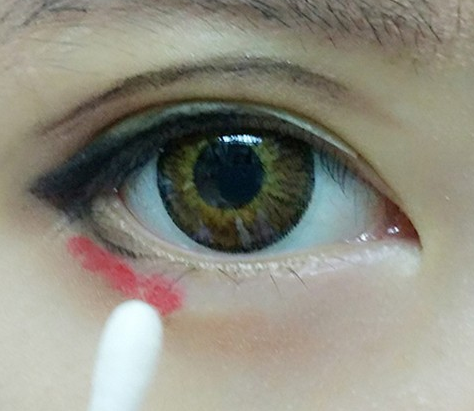
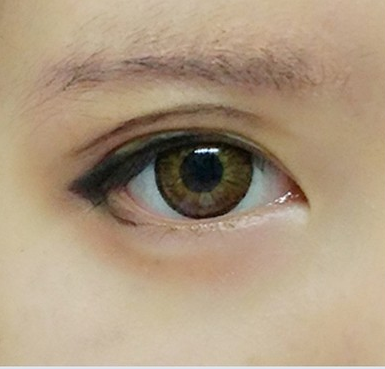
Then, take out the lipstick, and draw a arc at the lying silkworm area. Spread it evenly with cotton swabs. Seraph iSeraph J
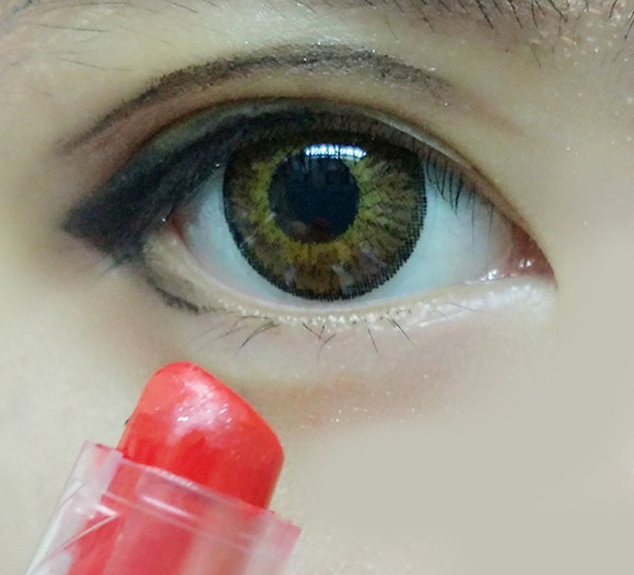
It turns out surprisingly great, right? Apply some mascara, and your eyes will look brighter.   Seraph kNow we’ve almost finished the eye makeup. what’s left are shaping your nose and put on some lip gloss.Seraph l
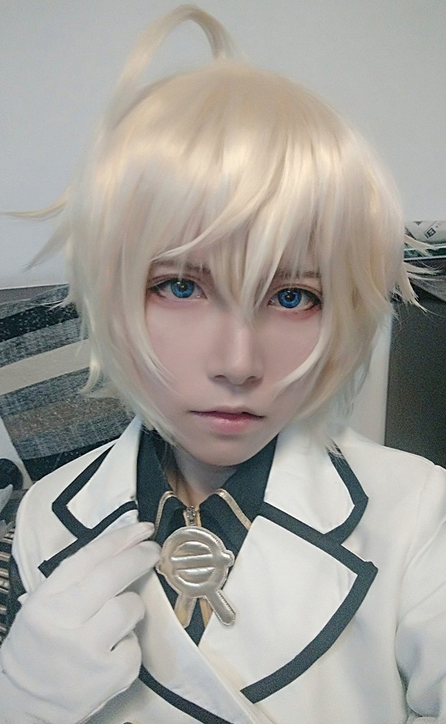
Try on the wig and get excited! Do you feel the thirst for blood?


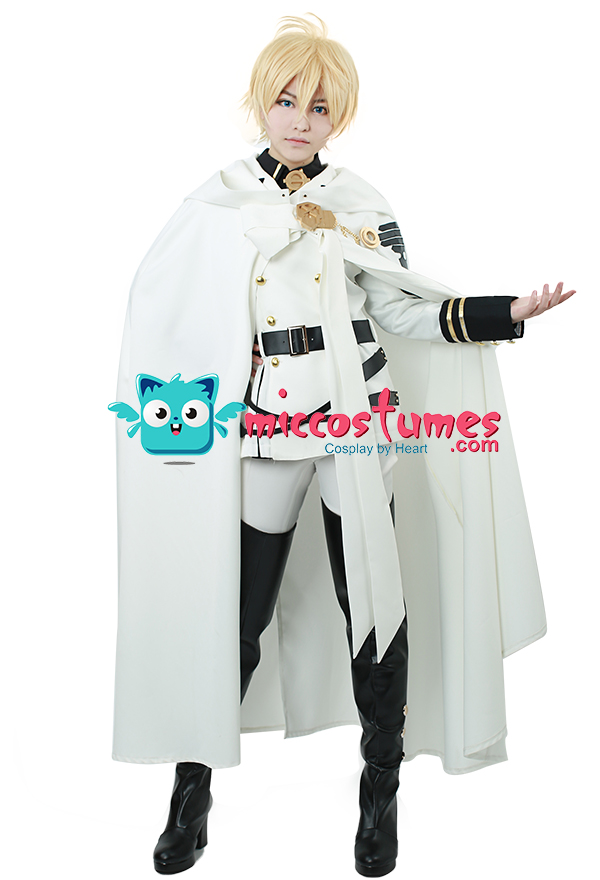
Quality Mikaela Hyakuya costume and wig  can be found at miccostumes.com. And more Seraph of the End cosplay and wigs are also available including Yuichiro Hyakuya, Krul Tepes , Ferid Bathory, Shinoa Hiragi, Mitsuba Sangu, Guren Ichinose and Yoichi Saotome.

Seraph costume


How To Style Spiky Wigs For Cosplay? Taking Kingdom Hearts Roxas As An Example

When you plan to cosplay a character and buy the wig, do not be surprised that the wig is not that identical as the character and you can not just put it on. How to style the wig becomes a  common question for cosplay fans.  Therefore, today we will focus on  styling wigs especially for characters with spiky hair such as Roxas from Kingdom Hearts or Cloud Strife from Final Fantasy.  We will take Roxas wig as an example in this tutorial. Read More

How To Make League Of Legends Caitlyn Hat For Cosplay

Piltover, once an ideal mark for plunder, now is known as the City of Progress! Whom should the credit be gave to? Certainly, it should be Caitlyn, The Sheriff of Piltover.
For all Caitlyn lovers and cosplay fans, we are sharing a tutorial to make the hat for cosplay. and you can also find the costume here.
First step, We will  start from the hat body making. Cut EVA sheet of 5mm thickness into 4 pieces, which are in pairs and of two sizes as the following pictures.LOL bThen glue them together and what we get is a cylinder as the main body for the hat.  Next, cut proportionally 4 pieces of EVA sheet as the golden strips to decorate. Glue the 4 strips separately onto the seams of the hat body as pictured below.LOL uAs to the hat roof, cut 10mm EVA sheet  into shape and glue it. Remember to polish the edges, and you can also fill in the seam with glue or a toothpaste.lol eNext step is to finish the hat brim. Draw up a draft first, and cut EVA sheet accordingly.The middle part needs to be hollowed out and then add it to the main body.The four sides are curved by hand, if the material is too hard to bend, warm the edge with a lighter first.LOL fCut a long square, and glue it to the upper area of the brim.done with that, it looks like thisLOL RThen we will move to the roof details. It simple and easy to learn. Make a pattern first, draw the figure, cut it and glue.LOL jThe last big step: the aiming mirrors and connecting rod hanging aside.
Transparent plastic you will find anywhere can be used to make mirror. Draw the pattern as the photo below, and use art knife to cut in accuracy. We need 3 pieces of different size in total.LOL mAnd then two frames made from EVA are used to clamp each mirror.LOL hFor the connecting rod, EVA is too fragile, so PVC of 8mm thickness is adopted here. Cut two extra EVA cycles and glue them to the rod. It turns out like this:LOL tSimilarly,  make a smaller rod and glue it to the biggest frame like the followingLOL kFind a PVC tube to string them together. And then add an EVA cycle to each end to fix.LOL qSame way to connect the big rod to the smaller one attached with all mirrors.LOL nPrepare another tube to connect the big rod to the hat roof. Cut a round piece of PVC material to decorate, the figure can be engraved by a ball-point pen. LOL oDraw  up the area needed to be cut, an art knife is adopted to cut the hole at the edge.LOL pThen take out the EVA sheet of 10mm thickness again, and cut four circular rings and use hot melt glue to fix them to the hat inner side. the tube can be used to thread through the hole to help locating the EVA rings. Donot forget to color the gear at the top of the hat into silver. To avoid smearing the adjoining area, use Crepe Paper to cover  the edge first and paint.LOL wFind an EVA sheet of 2mm thickness, stand the tube and draw along to get a circle and hollow it up. Paint the EVA into golden and glue it to the hole. Remove the needless, it looks like thisLOL sOne more thing about the coloring, as the golden strips is of thickness, it is better to color the purple area and then use Crepe Paper to overlay the adjoining before paint the other strips into golden.

The final step: assemble, and it looks quite identical to the character’s , right?LOL yApart from the Caitlyn costume, more League of Legends costumes are available at miccostumes.com.

How To Make A Batman Styled Gauntlet For Cosplay

Everyone, here Vergia Farrow  is sharing her experience of making this Batman inspired gauntlet, she will contribute many valuable cosplay contend to our blog , let’s expect and see how she did this in the following article first.


As with all items that an individual can create, you can either find a pattern or layout for what  you are making or something close to what you are making.  I personally love to use patterns when it comes to clothing items. Accessories I tend to stray off the beaten path and create layouts.  This means the item could end up an exact duplicate, or  can just resemble the item the replica is made to resemble.In this tutorial, I chose to create a gauntlet that was Batman inspired.Batman cosThe materials I used for it are as follows:
1. Craft foam sheets(5 ½ x 8 ½ ) 8 ½ x 11 stock card paper

2.  Terraflex (You can use Worbla, Terraflex is a little cheaper and works very close to the  same) Hot Glue Gun (to attach the craft foam sheets to each other as well as the terraflex)
3.  Sharpie
4.    Duct Tape
5.    Sturdy scissors Ruler
6.    Measuring tape (the ones you use for your body, not carpentry)
7.    Heat gun(or blow dryer if you do not have a heat gun. Blow dryers take a little longer to heat the plastic) Plastic Primer           (primer not made of plastic will likely melt your hard work)
8.   Acrylic or Citadel Paints (Citadel paints are model paints sold my gamers workshop. They  are expensive, but worth the  money)
9.Velcro with doublesided tape on the backside

The first step I took was to research and decide on a picture of Batman to base my design on. I then measured my arm around the wrist, middle of forearm and top of forearm near the elbow. I measured the length from my wrist to my elbow as well. This  is important to make sure the gauntlet is the accurate length you would like it to be.

I then took the card stock and taped two pieces length wise together. I measured from the  bottom of the paper towards the top for accurate length, and used the middle of the taped together sheets as my middle point to put the arm measurements, to have equal lengths on both side.

Measuring around the points on your arm, you want to make sure you overlap about 2-3 inches when finding the measurement. My wrists are 6 inches around, and when I overlapped to make the flaps that are shown, the measurement changed to 8 ½  inches.

I took the straight edge of the ruler, and connected the lines from the wrist line to the line at the top of the arm line. This creates the overall shape. After cutting the initial shape out, I taped two more pieces of paper together and traced the first shape onto it. I used my ruler to sketch a ¼ inch measurement from the edge around the whole shape. From here, I cut the ¼ inch excess from the second shape. This creates the ‘step’ effect along the edges.

I used smalled sheets of craft foam, so I had to tape 4 small sheets together (as shown in pictures) to cutthe initial shape out for one arm. I then took one sheet, and took the corners from the original foam to save on materials. I taped the corners to the  single sheet of foam, and then trimmed it to match the shape of the second cut out.

DSCN

DSCNaDSCNb

Read More