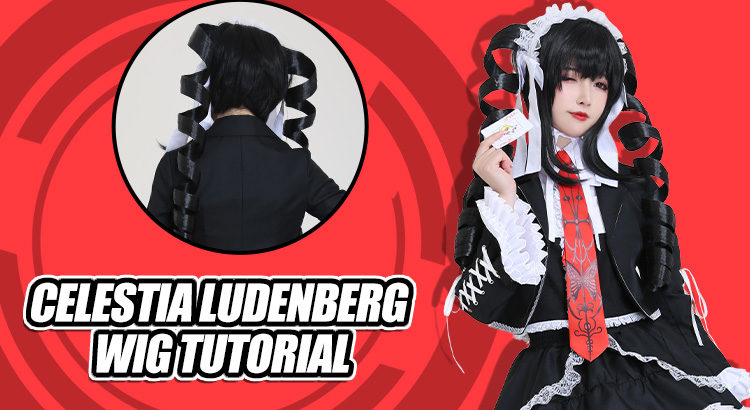
Hi everyone! Today’s post shows you a tutorial on how to make Celestia Ludenberg wig. Before doing that, some background is expected. Celestia Ludenberg, also called Celeste, is a character from Danganronpa: Trigger Happy Havoc. She studies in Hope’s Peak Academy’s Class 78th and participates in Killing School Life.
Read MoreAuthor: Alice Haruka
Animazement 2015 Con Report
Now that Animazement 2015 has passed post con depression is now settling in. However, to get over this depression I look back on the memories made and the pictures and videos I took this weekend.This reminds me that even though this post con depression looms heavily over me I still had an amazing time!.Because Animazement is a 3 day convention not counting pre con I made one or more unforgettable memories that I would like to share with all of you so now I would like to go day by day and tell you what I had experienced!
Friday: Friday was one of my favorite days! This is because on this day I went to my first Japanese Rock Band Concert. The group performing is called Rookiez Is Punk’d (the band that also plays the opening song in durara) This group consisted of highly charismatic members that even with one look your heart would feel like it’s flying and that’s even before they actually started playing! Their music filled the whole exhibit hall and literally everyone was able to feel the music take over them (It was like being taken to another world!). Even though Most of the fans were meeting Rookiez Is Punk’d for the first time you couldn’t help feeling such a down to earth connection between the Band and the fans. By the end of the concert my hype was literally at its peak! The hour had gone by faster than I expected and my friend and I had not knowingly lost all our hearing for the day (whoops!) but in all honesty it was totally worth it!

Another thing that happened on Friday which made my feelings grow even more for the fandom loving community revolves around a hot dog. Yes I did just say hot dog. That day I had formed and interesting craving for Hot Dogs and started toward the closest hot dog stand, while in line I looked at the menu that they had and became extremely confused about what kind of hotdog I usually eat…Was it beef or was it Sausage? They both sounded great to me but I couldn’t decide till one of the congoers infront of me turned around and explained the difference to me and also gave me advice of which one was the best. When the congoer approached the hot dog stand they surprised me and said that they would pay for my hot dog since it was my first time trying it. I was surprised yet happy and that is something I will always remember ^~^
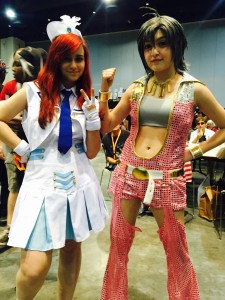
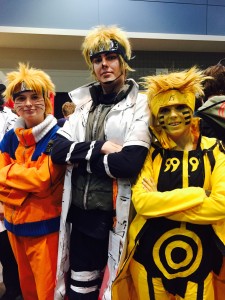
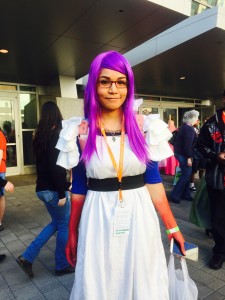
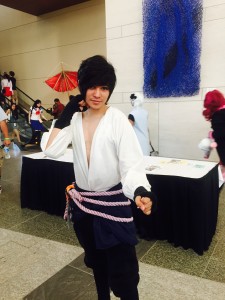
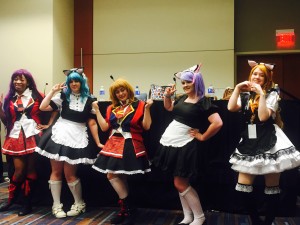
Saturday: Saturday is the day that many look forward to because thats the day that you see the most cosplayers. (The more cosplayers the bigger builds you tend to see!) On Saturday I was able to get many pictures of different cosplays and geek out over characters that I loved from different anime shows and fandoms! Here are some amazing cosplayers that impressed me with their cosplays!!

Sunday: Once Sunday rolled in my Post con depression had already started to hit me and I realized that I would have wait once again another year before I would see a lot of these amazing and creative people again. I wasn’t ready for the fun to end. On Sunday I went to a few panels, one which included a panel ran concert by AKB0048 cosplayers (I’m obsessed with AKB0048 so they only fueled my obsessesion xD). This panel was honestly one of my favorites because I’ve never been to a panel focused strictly on Idol anime and actually bring to life some of my favorite characters from the anime. I found out that the group running the panel the group had actually just formed recently and that they plan to make it a big thing to perform and compete at other conventions (you can find them on Facebook under the name of AKB Cuties and Fandames Initiative). Something I also discovered while being at that panel is how fun being a WOTA is. Now, I’m basically a noob at this because I only knew about WOTA from AKB0048 but in my definition “WOTA-ing” is sorta like sychronized exotic fast pace dancing that involves lights. As I watched the “WOTA’s” at the panel they all had a different speed and light color for each song that came on to support the AKB0048 members. It was really impressive and hard to not go along with it.Though I didn’t have lights like the professionals who had like High class lights, I joined in and by the end of the panel one of the pros came over to me and told me how impressed they were by me keeping up with them! I left the panel by having a red band around my head (one of the WOTA’s was wearing one that expressed their love for AKB0048). Now, I’m obsessed with the thought of WOTA xD.
Even though AZ has ended I am already preparing for next year when I get to see everyone again! The convention once again didn’t disappoint me and I would recommend this convention for anyone who would love to meet new people! It’s a great place for making new friends and expressing yourself! I did Vlog this convention and hope to have the video of it up soon! On my way home I put together the videos to make a preview video and you may find that at the bottom of this post! Everything will be posted to my YouTube channel called Alice Haruka soon! As always remember Stay Positive, Stay Healthy, Stay Creative!.
ps. Here is the link to the preview video~
http://replayapp.com/v/hGhytcIjY7/
How to Weather and Add Blood Effects to Cosplay Armor and Props Tutorial
 Hello everyone!! Today I’m going to teach you how to Weather and add special blood effects to your Cosplay Props and Armor. To give you a short and simple definition/background on the word weathering. Weathering has been used for aging certain items to give them an “Older effect”, and while also bringing a lot of definition to it. I decided to do this tutorial on Weathering and adding Blood Effects to props and armor because in the past I had no clue and asked myself over and over and over again. “How was I suppose to weather?”, “What do I even use for weathering?” (What Weathering even was xP I know now though!), “how would I add blood?“, “Is there such a thing as too much blood?”. I never found a tutorial that went in depth in weathering or doing these types of effects. Which, led to me teaching myself on my own and also watching clips where people described how they weathered and added blood to their armor and props. This Thus, led me to choosing the next perfect tutorial for all of you! (Yayyyyyy let have some fun okay?~). Hehe, So without further a do lets begin the tutorial ^~^
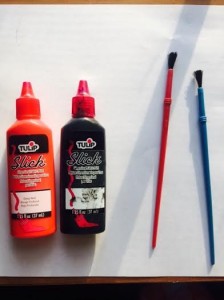
First Lets go over your materials you will need!:
- Black Paint
- Red Paint
- Two Brushes
- Your hands (I’ll explain this xD)
- The prop that you would like to Weather and/or add Blood to
- Clothes you don’t mind messing up (It’s going to get a little crazy!)
1. Now the first thing you need to do is grab your Prop/Armor and check to make sure you have painted and primed it with the main colors that you desire. I used my handy Mod Podge to seal the armor over and over after painting each layer (Tip: I found out that actually using the Fabric Mod Podge on Craft foam actually helps absorb the colors really well! especially fabric paint!) Before even going and starting to weather, I ask that you get an idea of how old you would want your prop to look (Don’t want it to look older than needed! However, by all means go crazy with it!)
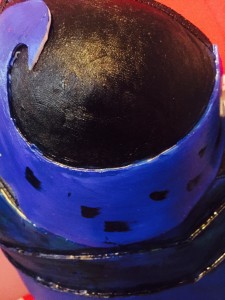
2. Once you have your idea grab your first brush and black paint! The black paint is to help you with the weathering. When I started with the weathering I first went and put paint in every edge that my brush could reach to. For example like above I outlined the parts of my armor especially in the sharp points! I grabbed a simple Brush and started outlining everything (sorry I forgot the pic for this part! But don’t worry, you’re not missing anything!)
3. After Outlining your Prop/Armor this is when thing start getting a little wild! You can use your bare hand in this part if you would like, but where you outlined your parts take your index finger and start rubbing the paint in all directions (do it as though you’re spreading butter on some bread :3) You must hurry though, because the paint can dry quickly! But even then it will still help with making your Prop/Armor become more distinct. After doing this I found a way that you could quickly do this in the more bigger parts on your Prop/Armor!. I took paint a dabbed it a few time in one big area and then I rubbed that are completely with my hand. Below is a picture of how I dabbed the paint around. The more paint you use the darker it will get and mesh together so please be considerate of that (Remember once the paint goes down its hard to correct >//.//<)
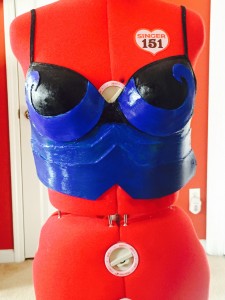
 4. Repeat the steps above till you are satisfied with how everything looks. After you have darkened everything the way you wanted, your prop/Armor should distinctively looked differently than how it did before. My Armor came out this way after I had gone and Weathered everything ^~^
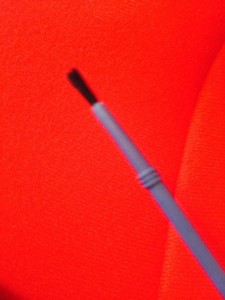
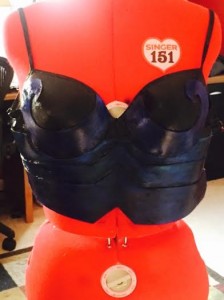 5. Wooooooo After completing your weathering its time to Add Blood~(This is not required but is another short extension of this tutorial) I was really nervous when I decided to add blood to this piece (Its so pretty *^*) but in the end it came out really well. The first thing you need to do is grab a new brush and some red paint! When you have the paint on the brush (Again your hands will get dirty xD) Pull back on the brush hairs and lightly let the paint flick onto the desired Prop/Armor. This creates a splatter effect of actual blood as it dries. I did alternate between using the splatter effect and also using the same technique I did with the weathering technique (That also works really well!)
 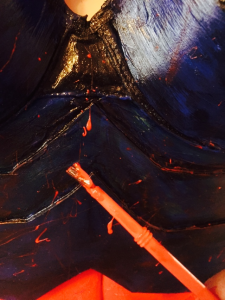 6. After Splattering blood to your hearts content (Don’t enjoy it too much 😉 lol) The Prop/Armor just needs to dry and you’re all done! Congratulations!! Below is the finishing Picture of what my armor looked like in the end :3
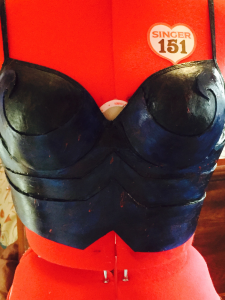 I really hope this tutorial was useful to you, even though I wrote this for Props and Armor its not limited to just that. I would like to thank you for reading this tutorial. I love being able to pass on what I learn on to all of you. If any of you were wondering about what materials I made the armor from, I made the base of the breastplates from a bra and then foam fabricated everything with regular craft foam. The paint I used was actually fabric paint rather than normal acrylic paint and I sealed everything with Fabric Mod Podge. However, If you use Acrylic paint I believe it will do just the same thing (xD). This was a really fun tutorial that I enjoyed doing very much! So as always everyone Stay Positive, Stay Healthy, and Stay Creative.
How to Make Rose Quartz Cosplay Crystal Gem
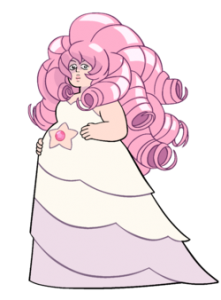 Hiya everyone! I’m sorry I haven’t posted in awhile >.< forgive me please? School has been a lot these past few weeks, but that should be no excuse! However, now I have everything settled and I can do more for all of you 😀 yaaaaaay! Anyways, today I’m going to do a tutorial on ‘Rose Quartz‘ star gem from Steven Universe. If many of you do not know ‘Rose Quartz’ She is the mother of the main character Steven in the show ‘Steven Universe’ and also the former leader of the Crystal Gems who protect earth and other worlds from evil and corruption. If you haven’t watched the show Steven Universe I highly ,( and I emphasize highly) recommend watching it and also exploring many of the other Crystal gems that are great for Cosplaying! I chose Rose Quartz because when she was first introduced I was immediately captivated by her beauty and I love her background story on how she came to earth and how it led to Steven being who he is today 🙂
Now, before we can get started here is what you’ll need!:
- Heat Gun
- Craft Foam (Red, Yellow, Pink if you choose to not paint)
- Paper
- Marker
- Hot glue Gun
- Paint ( Preferably red, yellow and pink)
- Scissor or Exacto Knife
- Some type of solid wood/Plastic area (This is for when you use the heat gun)
- Mod Podge
- Paint Brushes
DanganRonpa-MonoBear Cosplay Ears Tutorial
 Hey Everyone! Today I’m going to do a Cosplay Tutorial on how to make MonoBears ears from the anime Dangan Ronpa. Some background information on MonoBear also known as MonoKuma is that he is the main antagonist in the anime Dangan Ronpa. MonoBear has a good and bad side of himself which is apparent because is body is equally split down the middle with one side of his body showing his good side and the other half showing his bad side. Depending on MonoBears mood determines which side of him you’ll see (Careful not to get on his bad side!). Now that you know the details of MonoBear let’s get started with the tutorial 🙂
What you’ll need for materials:
- One Sheet of Black Felt
- One Sheet of White Felt
- Black and White Thread
- Hair Clips
- Polyester stuffing
- Hot Glue
- Paper
- Black Marker