EMBED THE IMAGE Above ON YOUR SITE
After knowing how to make Devil Kings Date Masamune’s armor, macros frontier Sheryl nome’s microphone, etc, we plan to share you tutorials on how to make Gintama Okita Sougo’s gun here. For sure, a convenient and similar prop will help you have a better time on a cosplay show. Now, let’s begin.
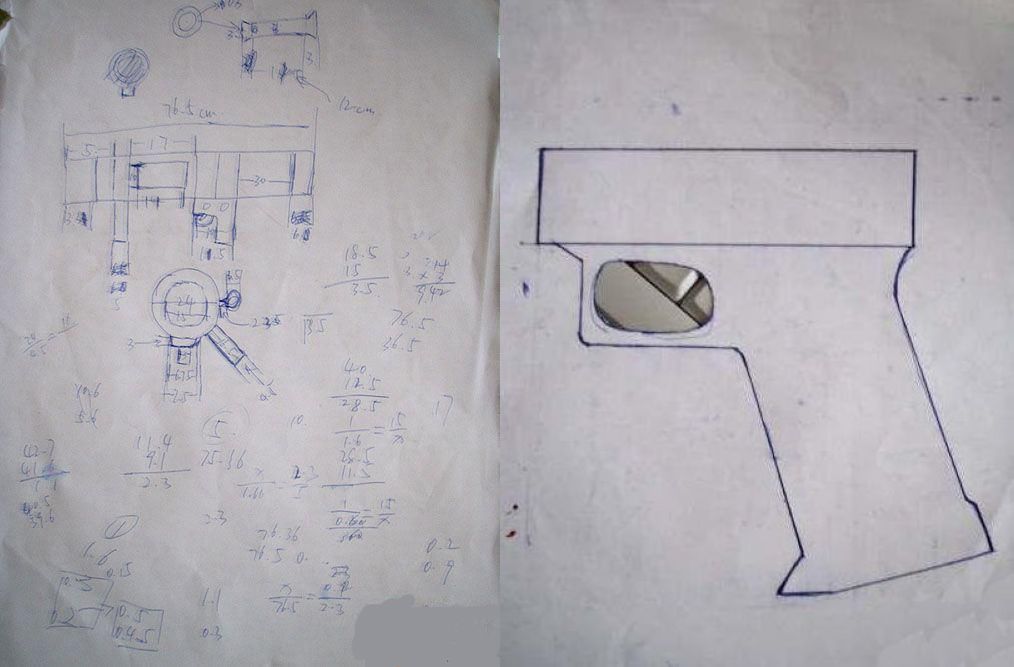
Tip 1. Draw a blueprint.
See from different angles; you will get different designs on Gintama Okita Sougo’s gun. Thus, select one first of all and don’t change it over and again.
Tip 2. Choose materials.
Required material: black paperboards, black grey boards, PVC pipes and corrugated paper.
Materials have a direct reflection on how props will look and the difficult level of making. Here, black paperboard is a must-have item. To make layers seem much clearer, you are recommended to choose black grey boards with a moderate width and thickness. But when it comes to the black gun body, grey boards are not suggested.
PVC pipes are ready-made, convenient to be used and inexpensive. It depends on you while choosing the length and diameter. Usually, pattern with a length of 1 meter and diameter of 16cm is selected.
Corrugated paper should be a universal material on making cosplay props. You get this cheap material from the packaging box of milk or instant noodles.
Tip 3. Find other tools.
Required tools: knife, scissor, ruler, pen (black is better), hot glue gun, hot glue stick and latex.
Tip 4. Make the gun.
1st. Prepare components according to the blueprint. Referring to making the trigger and pikestaff on the gun, you can buy a cap gun and fix it around the barrel by black paperboards on the basis of the size on your design drawing. In this case, you save a lot of time and make a gun seeming three-dimensional. Or you can make a model with a ready-made pikestaff in your home. Take the measurment, draw the blueprint, make plates by corrugated paper and glue them. 4 layers of corrugated paper can make the required depth. Put trigger between two layers in the middle and build the frame on outside two layers. Finally, paint it to be black.
2nd. Make the gun body. Two ways can be also adopted here. First, use PVC pipes. Take the right measurement of length. Cut and color them, which will be rather time-saving. Second, use black paperboard with a layer of corrugated paper inside to enhance the strength. In this case, glue black paperboard with corrugated paper first. Planish them and wait until they dry. Paint the insider corrugated paper to be black. Add more water in pigment, which will make corrugated paper more wet and easy to be molded. Then, roll it up and seal it by hot melt glue. The gun body is finished when glue dries.
3rd. This step is much easier. Just stick previously prepared components upon the gun body one by one. For a better tiered look, black grey paperboards are used to make parts on the outside surface. Thus, hot melt glue is chosen. Just pay attention to this: well control the time while using hot melt glue.
4th. Rivets can be made by thumbtacks. Then paint them by black oil pen, seeming really vivid.
Tip 5. Modify some details.
Final modifications ask you to be patient. Take the exposed nonblack lining as an example. It should be painted to look the same with black pigment around. Then, deal with extra hot melt glue on the surface. Adjust the directions of some small components.
To make a cosplay weapon is exactly an enjoyment. More tutorials will be continually shared here.


