How to make Lucy Heartfilia’s whip from Fairy Tail

lucy

Cosplaying as Lucy Heartfilia from Fairy Tail? Looking for a whip to complete the look? All you can find online are SM and fetish related items that cost over $20USD? Well I’ve been in that situation >.<’  This tutorial will show you how to make your own cheaper alternative!

What you need:

• 2 metres of cheap black fabric. I bought mine for $2.50 a metre

• Cardboard tube with a decent diameter for you to hold. You can try asking the fabric shop assistant if you can have the cardboard rolls they plan to throw out. The shop I went to gave me all of theirs for free…like 15 rolls…. Must.Make.Keyblade!

• 40cm of flat rope.

• Roughly 1cm wide White ribbon

• Brown paint

• Interfacing

• Hot glue

• Maybe some polyester stuffing. You only need this if the cardboard tube is really wide.

Steps:

1. Cut your black fabric into 4 strips roughly 10cm wide. You want to keep the 2m length so cut on the side of the fabric. (if your tube is wider try 5 strips)

2. Fold each strip in half and sew it down. Do this for all your strips

3. Now for the time consuming part… pull the inside of the strips out so your sewing is hidden within. A fast way of doing this is to get a paper clip and bend it out to form an “s” shape, then using sticky tape stick one end to a thin stick so you get a stick with a hook on it. Put it though the fabric strip all the way to the end, hook it into the fabric and pull it out.

hook

4. Once all your strips have been pulled out, lay them on top of each other and sew a line 15cm from the edge.

end a of plait

5. Now plait the strips together until you reach the end. Then sew the strips together to hold the plait in place. I WILL CALL THIS END OF THE PLAIT “Z” and the other end “A”

plait

6. Cut out 2 curved triangles from the interfacing and iron it down to black fabric, leaving a 1cm edge around them.

triangles

7. Fold the 1cm flap into the triangles, iron down and sew around.

8. Get the end “Z” of the plait and hot glue it onto one side of the triangles. Then hot glue the other triangle on top of this.

triangle and z

9. Fold your flat rope in half and sew this to the “A” end.

flatrope

10. Cut off 15cm of your cardboard tube and paint it brown. Leave to dry

cardboard tube

11. Measure 1cm from both ends of the cardboard tube and make a small mark with a pen. Using hot glue, stick white ribbon onto the tube at the 1cm line.

cardboard tube ribbon

12. Slide your plait into the tube. If it is loose add polyester stuffing into the tube and seal it off with some scrap black fabric by hot gluing it in.
Here’s what it should look like!

whip

lucy cosplay

Check out my deviantart page if you like this tutorial and my other tut on how to make your own Lolita maid headdress.
How to make your own Lolita/Maid Headdress

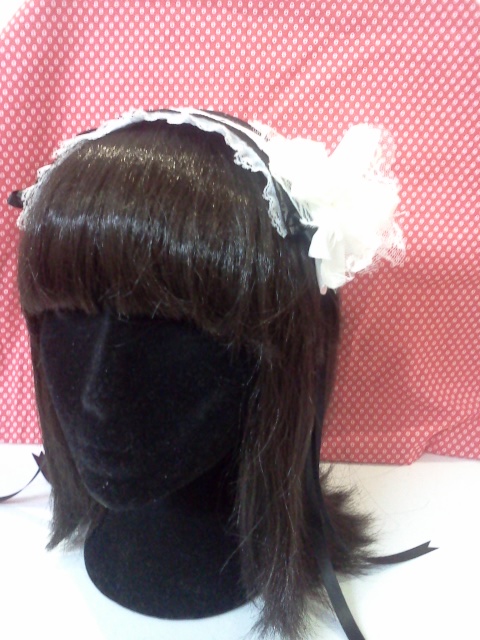
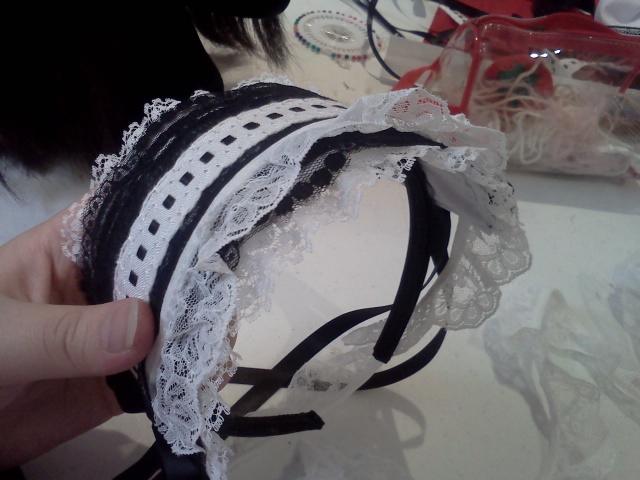
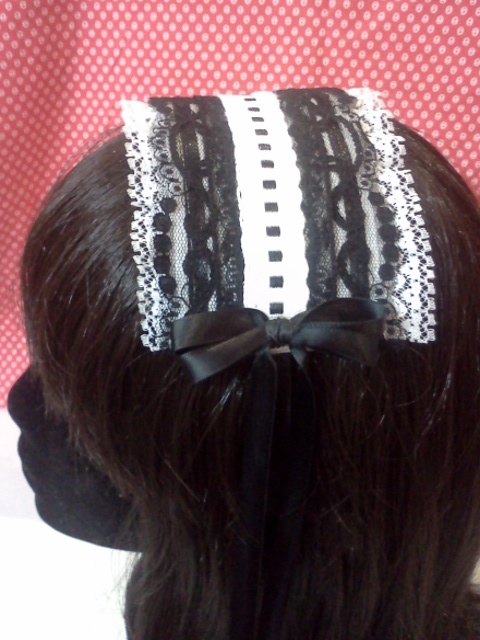
Thinking of cosplaying as a maid? Love Lolita fashion? Want to stand out from the crowd when waiting for the bus or train? Well this is a tutorial that will show you how to make your very own super cute and elegant Lolita headdress. The tutorial will show you how to make the headdress below.

Lolita fashion is based on the aesthetics of the Rococo and Victorian periods. The most classic colours used are black and white. These colours are perfect for those who are new to Lolita fashion. Lolita headdresses are typically rectangular in shape and generally have a focus point that runs along the middle of the headdress and lace trims for the edges. Repetition and balance are also key aesthetics that we have to keep in mind when designing our headdresses.

What you need:

• Light cotton fabric – this is our base colour
• Interfacing – this will strengthen the fabric and make it easier for us to work with
• Fabric binding glue – can be sold in a small roll or by metre. This looks like a web and is used for appliqué.
• Ribbon – find a colour that suits nicely with your base fabric colour. A ribbon colour that is opposite to the base colour is usually pleasing to the eye and it also gives emphasis.
• A variety of lace trims – the reason for a lot of different ones is that you never know a certain type may look better when you are putting fabrics together 😛
• Plain black headband/hair band
• Hot glue gun and glue

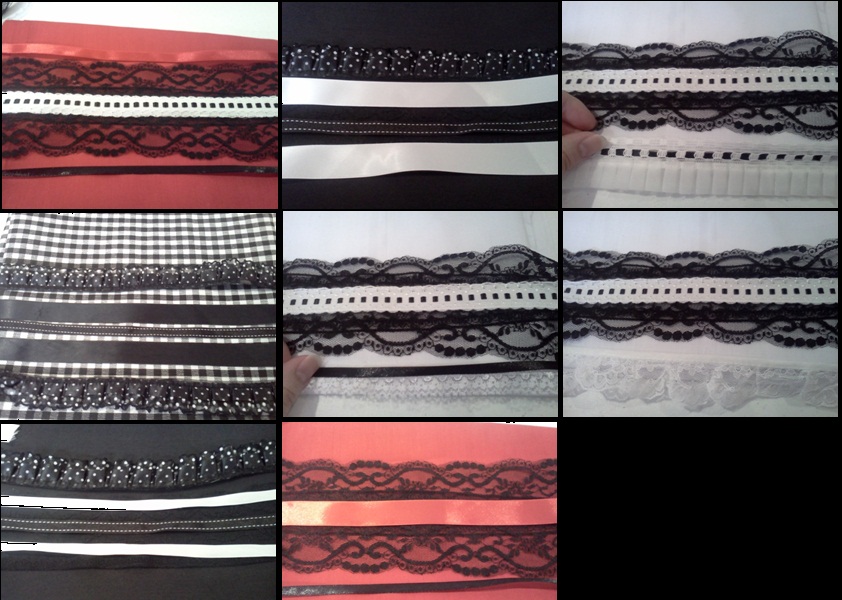
Here are some examples of different types of headdresses you can make when playing around with fabrics and lace.

1) First cut out 2 rectangles 25cm x 9cm or 10 inches x 3.5 inches.
2) Fold in the edges roughly 1cm or 0.5 inches and iron down. Do this for both rectangles
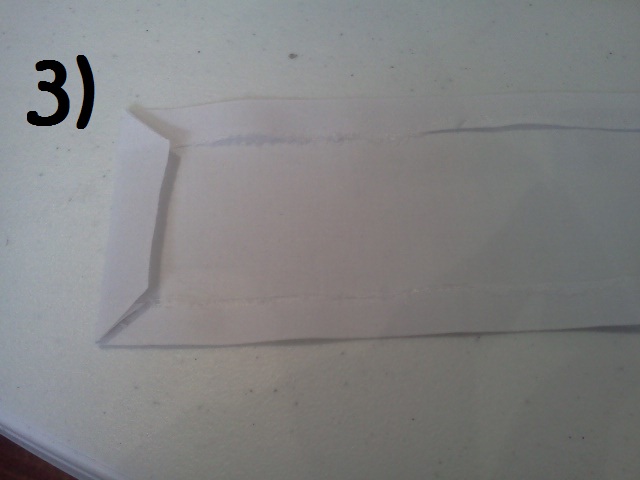
3) Where the fabrics overlap at the corners, cut it at an angle. Do this for both. This will make sure when sewing the corners, it will not be too thick.


4) Lay your rectangle on the interfacing and cut around it, slightly trimming the edges so that the interfacing piece is a bit smaller than your rectangle.
5) Iron down the interfacing onto one of your rectangles. The interfacing seals the 1cm flaps you made.
6) Cut out 2 pieces of lace, make sure the lace has at least 3cm [1 inch] hanging out on both sides. My lace piece is much wider than the headdress so I decided to fold it in so that when 2 pieces are next to each other and the combined width slightly goes over the edge. The folded parts also become a feature on my headdress.
7) Using the binding glue/web put this along both lace pieces, making sure that it runs along the middle of the rectangle and iron down. NOTE don’t forget to change the iron temperature to low, the lace might shrivel up.
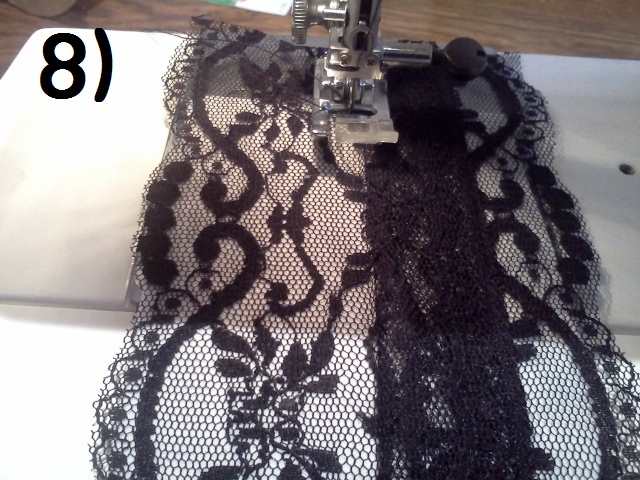
8) Now thread your sewing machine with black thread and sew along the middle of the headdress. You should be sewing one line for each lace piece. It’s alight if you can’t sew straight lines, the sewing will be covered later.


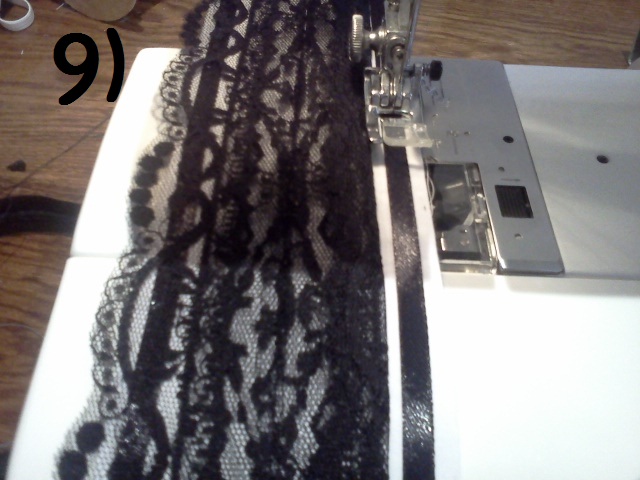
9) Lift up the lace flap on one side and sew a strand of ribbon along the edge leaving a small gap. Do this for the other side as well.


10) Cut your desired ribbon/lace etc that will be the centre focus of your headdress. Make the length of it slightly longer than your headdress because it will be folded in later.
11) Cut the binding glue/web to the same length as your headdress and place it in the middle and then put the ribbon over it then iron down.
12) Choose a lace trim and cut it to a length that is slightly longer than your headdress. To add more volume to your headdress you could sew on a few more layers of lace trims or frills.
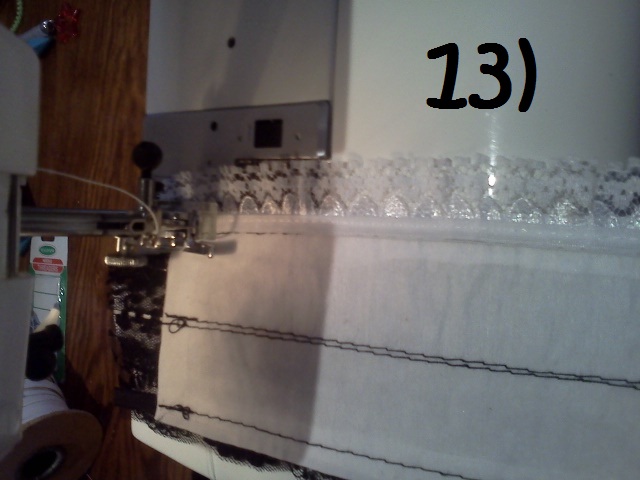
13) Sew the lace to the back of the headdress using white thread. Make sure to sew as close to the edge as possible this way the thread does not cross over to the ribbon. Do the same for the other side.

14) Place your other rectangle piece under the decorated side, make sure that both the 1cm folded flaps are facing each other.
15) Fold over the black lace and sew on that side of the 2 pieces.
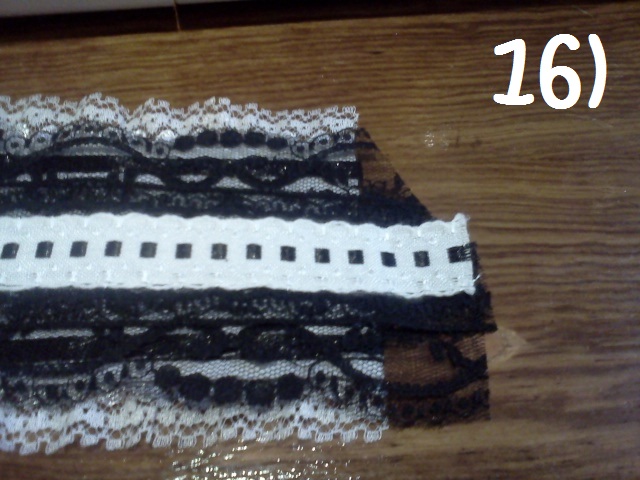
16) NOW change over to black thread. With the extra lace hanging off the sides, cut it at an angle to make a triangle and fold this in between the 2 rectangle pieces and sew together the 2 shorter sides.


17) Change back to white thread. Doing the same step as 16
18) Cut off the lace trim to the same length as the headdress.
19) Grab your headband/hair band and place your headdress over it. Find the perfect position for it where it will be in the middle and balanced out on the band.
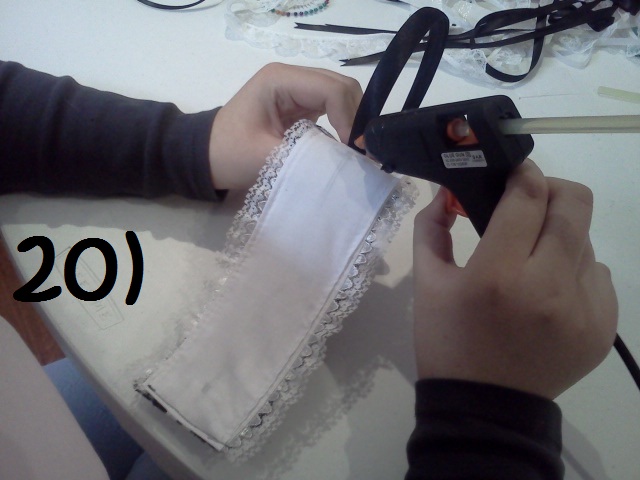
20) Holding one end of the headdress and band, put a dab of hot glue in this spot and press them together. Wait for the glue to dry before continuing. You may find that hot glue goes over the band, don’t worry too much because it will be hidden when you wear it.

21) Once you have finished gluing the headdress to the band make 2 bows out of ribbon the same width as your headdress and glue them to the sides of your headdress. This will cover the black thread underneath as well as make it extra cute. You could also add flowers, bells or whatever you find awesome.

And there we go, a cute and elegant Lolita style headdress.

Other ideas:

Check out my page at mixiao.deviantart.com for more maid lolita costumes, accessories, anime inspired stationary such as vampire knight folder covers and other artworks. Thanks for reading! o(^0^)V

How to Make a Katana?

Katana has become a symbol for Japan. Also known as Samurai sword, it roots in a really long time ago and leaves a deep impression on lots of people. Nowadays, since cosplay becomes a popular entertainment activity, most people do love to put those shape swords into good use. But believe it or not, it won’t be easy to make a katana for cosplay, especially after you follow us to pay a visit to the Japan Katana Forging Research Institution below.

In Japan, it’s called as かたな or つるぎ, which is one of the three most popular swords across the world. According to shape and size, it can be divided into Tachi, Uchikatana, Wakizashi, Tantou, etc.

Katana is not only a kind of weapon, but also a beautiful artwork or artistic product. How can such an item that is subsided by history be made? Now, let’s explore the secret of the Japan Katana Forging Research Institution.

The signboard is a little small and the facade of Japan Katana Forging Research Institution is a little tattered. This is really disharmonious with the worldwide influence of katana, XD.

Sword is originally a kind of weapon to kill people. It’s a lethal weapon for human beings. But katana is beyond of lethal weapon. It’s an artwork with sense of beauty. Common katana has a proportion of 1: 4 on hilt and blade. It’s held on hilt by both hands and powerful while hacking. Its bend degree is controlled at the place of 16.7mm below the blade top. The biggest power lies in there, rather fitting the mechanics.

In Japan, katana makers are called as bladesmith, Seiken no Burakkusumisu or sword worker. While making a katana, a rather high-end technique is gathered. As a whole, after making the blade, quenching and polishing, bladesmith needs to make white wooden handle to keep the blade for sale. But the hilt, scabbard and Tan belong to another manufacturing line. They will be decorated by professional metal workers. In the Japanese history, sword workers have different factions. Some of them are even exclusive workers from shogunate.

Go to factories of making swords, you will find all katana are fully handmade. They are processed by experienced old workers personally. Lots of time is spent on making a katana. Workers have never stopped thinking about improving the making methods. Raw materials are high-class Tamahagane in Japan, which will only produce deluxe artworks.

Tamahagane is forged by a traditional indigenous method in Japan. It refers to a kind of steelmaking way under low temperature. The furnace temperature is never beyond 100℃. This method seems primitive. But compared with modern high temperature steelmaking ways, it more easily produces pure and high-quality steel.

But steel forged by high temperature is rather soft and easier to be forged to the desirable shape. Steel forged by low temperature is a little hard and difficult to be forged. So to speak, making katana is a manpower intensive work. Blood and sweat get quality in return.

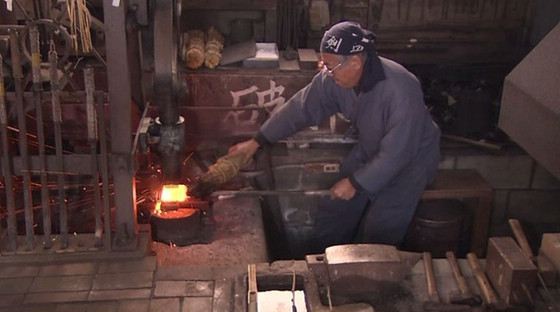
Pill forging is a crucial process during forging a katana. It means that bladesmith heats the steel to be transparently red and forges it by beating. When the heat is open while being thumped, fold it and beat it over and over. After times’ thumping, the steel can be extended to the fullest.

In most cases, the steel needs to be folded 7 or 8 times. Sometimes it will be folded by 20 to 30 times. In each time’s thumping, more than 100 times are needed. By this step, impurity in steel like sulphur and carbon can be cleared away to enhance the elasticity and tenacity of steel.

Quenching is definitely so-called thermal treatment. In Japan, it’s called as Mizuheshi. From the view of modern material theory, this step enables bladesmith to control the carbon content in steel.

A circular model is used on both the sword point and the whole blade of katana. The phenomenon of blade being arc is due to the collocation of steel and quenching.

The packaging method of katana is rather tasteful. Different decorations are used onto diverse categories in different eras. Katana, widely known all over the world, is not a kind of weapon, but an artwork. It has a rather high artistic value for collectors.

To make a katana is different with to make a costume or a pair of shoes for cosplay. It’s much more difficult and technological. Thus, those bladesmithes deserve saluting.