 Hello everyone!! Today I’m going to teach you how to Weather and add special blood effects to your Cosplay Props and Armor. To give you a short and simple definition/background on the word weathering. Weathering has been used for aging certain items to give them an “Older effect”, and while also bringing a lot of definition to it. I decided to do this tutorial on Weathering and adding Blood Effects to props and armor because in the past I had no clue and asked myself over and over and over again. “How was I suppose to weather?”, “What do I even use for weathering?” (What Weathering even was xP I know now though!), “how would I add blood?“, “Is there such a thing as too much blood?”. I never found a tutorial that went in depth in weathering or doing these types of effects. Which, led to me teaching myself on my own and also watching clips where people described how they weathered and added blood to their armor and props. This Thus, led me to choosing the next perfect tutorial for all of you! (Yayyyyyy let have some fun okay?~). Hehe, So without further a do lets begin the tutorial ^~^
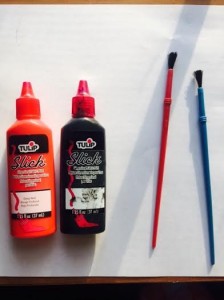
First Lets go over your materials you will need!:
- Black Paint
- Red Paint
- Two Brushes
- Your hands (I’ll explain this xD)
- The prop that you would like to Weather and/or add Blood to
- Clothes you don’t mind messing up (It’s going to get a little crazy!)
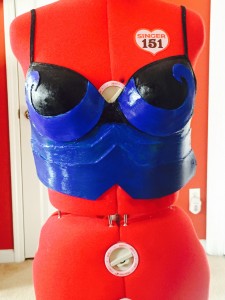
1. Now the first thing you need to do is grab your Prop/Armor and check to make sure you have painted and primed it with the main colors that you desire. I used my handy Mod Podge to seal the armor over and over after painting each layer (Tip: I found out that actually using the Fabric Mod Podge on Craft foam actually helps absorb the colors really well! especially fabric paint!) Before even going and starting to weather, I ask that you get an idea of how old you would want your prop to look (Don’t want it to look older than needed! However, by all means go crazy with it!)
2. Once you have your idea grab your first brush and black paint! The black paint is to help you with the weathering. When I started with the weathering I first went and put paint in every edge that my brush could reach to. For example like above I outlined the parts of my armor especially in the sharp points! I grabbed a simple Brush and started outlining everything (sorry I forgot the pic for this part! But don’t worry, you’re not missing anything!)
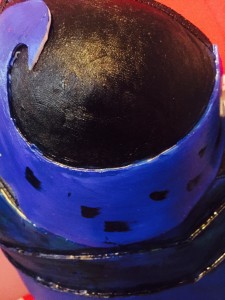
3. After Outlining your Prop/Armor this is when thing start getting a little wild! You can use your bare hand in this part if you would like, but where you outlined your parts take your index finger and start rubbing the paint in all directions (do it as though you’re spreading butter on some bread :3) You must hurry though, because the paint can dry quickly! But even then it will still help with making your Prop/Armor become more distinct. After doing this I found a way that you could quickly do this in the more bigger parts on your Prop/Armor!. I took paint a dabbed it a few time in one big area and then I rubbed that are completely with my hand. Below is a picture of how I dabbed the paint around. The more paint you use the darker it will get and mesh together so please be considerate of that (Remember once the paint goes down its hard to correct >//.//<)
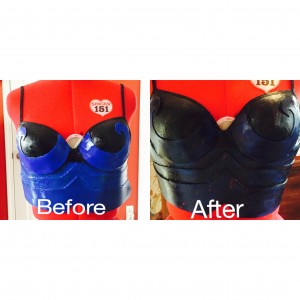
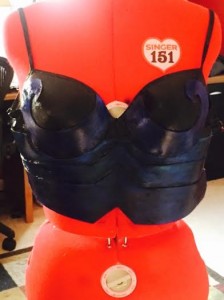
 4. Repeat the steps above till you are satisfied with how everything looks. After you have darkened everything the way you wanted, your prop/Armor should distinctively looked differently than how it did before. My Armor came out this way after I had gone and Weathered everything ^~^
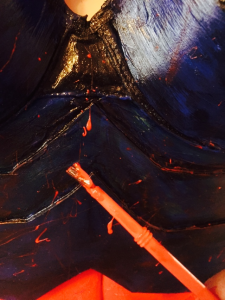
 5. Wooooooo After completing your weathering its time to Add Blood~(This is not required but is another short extension of this tutorial) I was really nervous when I decided to add blood to this piece (Its so pretty *^*) but in the end it came out really well. The first thing you need to do is grab a new brush and some red paint! When you have the paint on the brush (Again your hands will get dirty xD) Pull back on the brush hairs and lightly let the paint flick onto the desired Prop/Armor. This creates a splatter effect of actual blood as it dries. I did alternate between using the splatter effect and also using the same technique I did with the weathering technique (That also works really well!)
  6. After Splattering blood to your hearts content (Don’t enjoy it too much 😉 lol) The Prop/Armor just needs to dry and you’re all done! Congratulations!! Below is the finishing Picture of what my armor looked like in the end :3
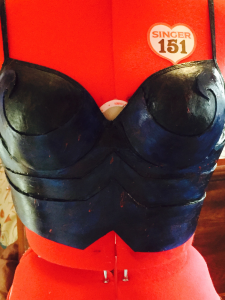 I really hope this tutorial was useful to you, even though I wrote this for Props and Armor its not limited to just that. I would like to thank you for reading this tutorial. I love being able to pass on what I learn on to all of you. If any of you were wondering about what materials I made the armor from, I made the base of the breastplates from a bra and then foam fabricated everything with regular craft foam. The paint I used was actually fabric paint rather than normal acrylic paint and I sealed everything with Fabric Mod Podge. However, If you use Acrylic paint I believe it will do just the same thing (xD). This was a really fun tutorial that I enjoyed doing very much! So as always everyone Stay Positive, Stay Healthy, and Stay Creative.
