DIY Sakura’s Feather from Tsubasa Reservoir Chronicle

This feather is essencial for your cosplay of Sakura from Tsubasa.

Tsubasa 7


Some backgroud info for the feather:

At the beginning of the series, Sakura grows wings from her back, which dissolve into magical feathers that are in fact pieces of her soul. These contain her memories since she was born, and if not retrieved, she will die without them.

Since these feathers represent her soul, these hold an enourmous amount of magical power. Each of them affect their surroundings differently. Whenever Mokona senses a feather, it goes “Meyko!” to alert the group.


Tsubasa


First, prepare the materials: paper, iron wire, scissors, tape or glue.

Tsubasa_1


Second, cut the paper.

Tsubasa_2


In this way you’ll get two same pieces of diamond.


Third, put the iron wire between the two pieces of paper and fix with glue.

Tsubasa_3


Now you can draw the pattern on it. Actually you can draw it after you cut the pieces, but I prefer to do it now.

Tsubasa_4


You can see the pattern on Pic 1, mine may not be good enough, please google it.


Last step, cut it to be like a feather.

Tsubasa_5


Actually if you’re too lazy to cut the paper, you can simply get a feather and draw on it.

(PS: the iron wire should be sofr, not too thick.)


The completed feather~

Tsubasa 6


Original article is written by zoey_佐伊.

How to Chose a Zelda Link Costume For Your Kids

original

Zelda Link cosplay is also a really hot cosplay idea for your cute kids! In our Link cosplay buyer guide , I have introduce the best Link costume pattern for kids, so in this article, I want to focus other more details.

According to your budget , there are several ways to complete Zelda Link kid cosplay:

1. Budget $70-$100:

Using the costume pattern from Four Swords,The Wind Waker,Four Swords Adventures and The Minish Cap:

399px-WW_Link_3

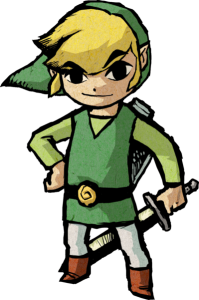
Custom made costume with the same belt buckle as the game, light weight Link sword and shield special made for kids , and also don’t forget the elf ear.
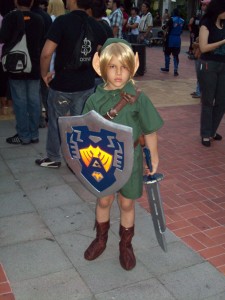
 

2.Budget $40-$70:

yhst-39560371480371_2272_38225418

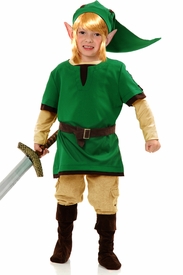
Using the kid elf costume instead of the Link costume, I recommend you can make a belt buckle like the one in zelda game.


062630-peter-pan-classic-child-costume

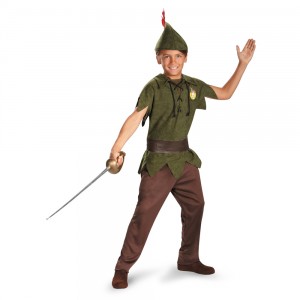
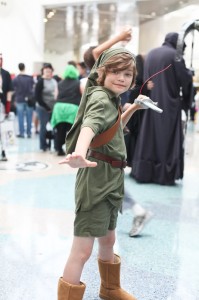
And also actually Link looks like peter pan, so peter pan’s kid costume  ( more cheap than the elf kid costume ) can be easily rework as Link kid costume as well. If you can not find any kid Link costume to satisfy your request, get a peter pan’s costume and modify it yourself will be a good choice.You should re-make the green hat and the costume cuff , and also get a light green tee shirt inside.

3.Low budget but enough time & craft work

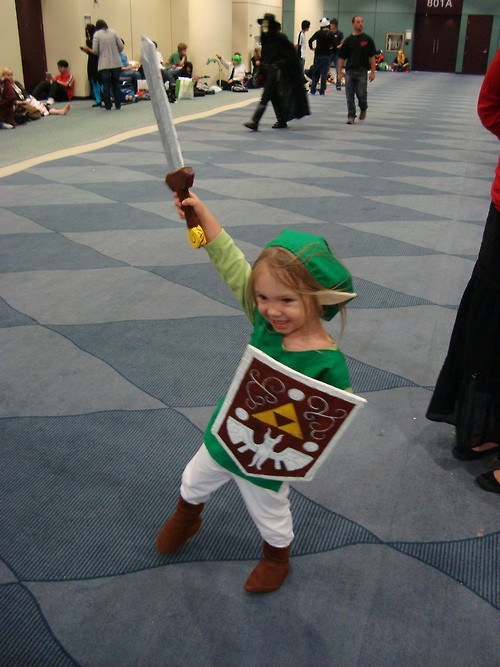
If you don’t have much budget for the costume but still wanna get more feature of the kid Link costume, I really recommend you to make the costume yourself. The best kid Link costume is always being made by the parents themselves, you can spend $10 around to get the best kid Link cosplay, there are some good examples:

windwaker_link_and_aryll___front_by_sabathamk-d5klw50wind_waker_link_and_aryll__back__by_sabathamk-d5klvhv
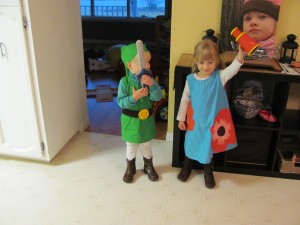
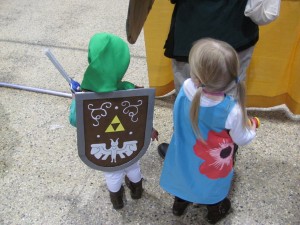
Cosplay from Sabathamk ‘s kid, I like the shield made by herself ,materials cost $1, and another $1.44 for the foam sword which being bought at superstore. For the Link costume pattern, you can find it at here,and you don’t need to make the Link shirt inside just get a normal green Tee for your kid will be ok.

And if you want to make the easiest kid Link costume, please focus to finish the Link costume belt set, then get green T shirt and shorts for your kids, then bingo! Check these two examples below:

anime_238VB2___Young_Link_Cosplay_by_villamar


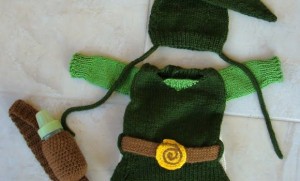
Also if you are making Link costume for your small baby, please follow this Kid Link costume pattern ,but you’d better have some basic knitting skill.

babylinkoutfit


Got inspired? There are two more suggestions:

  1. Don’t buy or make any Link sword & shield by metal or even wood,these swords could hurt your kids and other people easily.
  2. Try to make kid link cosplay yourself, not matter only he hat or a small kid belt, you will get really happy from the process.


DanganRonpa-MonoBear Cosplay Ears Tutorial

mono-bear_zpsd2279bd5
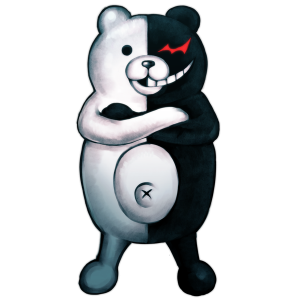
Hey Everyone! Today I’m going to do a Cosplay Tutorial on how to make MonoBears ears from the anime Dangan Ronpa. Some background information on MonoBear also known as MonoKuma is that he is the main antagonist in the anime Dangan Ronpa. MonoBear has a good and bad side of himself which is apparent because is body is equally split down the middle with one side of his body showing his good side and the other half showing his bad side. Depending on MonoBears mood determines which side of him you’ll see (Careful not to get on his bad side!). Now that you know the details of MonoBear let’s get started with the tutorial 🙂

What you’ll need for materials:

  • One Sheet of Black Felt
  • One Sheet of White Felt
  • Black and White Thread
  • Hair Clips
  • Polyester stuffing
  • Hot Glue
  • Paper
  • Black Marker

Read More

Miccostumes Weekly Summary Feb.23th-27th.2015

20150684-coffee-time-over-vintage-background-vector-illustration


The most important news of this week :  We back to work from holiday ! So we will accept orders from now on, we know most of them will be rush, but team will try our best to make orders delivery in time.

And we also welcome Ally to join in our blog to be one of our new blog author , hope she could help other cosplayers with her cosplay story and tutorials,for example:Levi and Ackerman step by step makeup. And also we have set up our author plan and blog contend management plan, thinking this year miccostumes.com’s cosplay blog will update more frequently with fresh quality contend related to cosplay,anime etc.

Other interesting cosplay anime news this week:

Read More

Attack on Titan Levi Ackerman Makeup Tutorial

Hello every one of the cosplay community! I am Ally, better known as Unexpected Link Cosplay, and I am here to show you how to become the rough and tough Corporal Levi & Ackerman from Attack on Titan!

Before we start, you will need;

  • Cleanser
  • Plenty of cotton swabs
  • A variety of makeup brushes and Blending Sponge
  • Eyebrow Brush
  • Glue
  • Pallet of eye shadow (mostly blacks and browns)
  • Foundation or Concealer
  • Eyeliner- Liquid or Pencil- I use both (BLACK and WHITE; but white is optional)
  • Loose or Compact powder

Face Prep

Always prep your face! It is helpful later on, plus it feels all nice if you do! I use Clinique Clarifying Lotion. I put this all over my face and EYEBROWS!

levi_tu_1levi_tu_2

Eyebrows

Now this is definitely the hardest part. After two to three years of cosplaying, I still have difficulties with blocking out my eyebrows. It is a trial and error process; so be patient!
For this, you will need your powder, glue and eyebrow brush. Apply the glue heavily; making sure you have got it ALL in your eyebrow. Then brush them UP, and wait for them to get a bit tacky, so they are easier to work with. Apply the powder, and your brows should look something like this:

levi_tu_3

Repeat these steps 2-4 times, depending on how thick your brows are. Here is a reference video that it goes VERY in depth on how to do it.

When you are finished, they should look like this:

Read More